Saturday, February 28, 2015

Hot process vs. cold process soapmaking. Which method is better?

Hot process vs. Cold process soapmaking. Which method is better?
It is always interesting question for all soapmakers! I make both hot and cold process soaps and I often get the questions - What's the difference? Does it matter if it is cold or hot?
You can read my previous posts for cold process and hot process soapmaking.tutorial. Shortly,
you prepare lye solution, prepare melted oils/butters, add lye solution into oils and stir until the trace.

After this point the two methods differ:
In the cold process method you add all additives (herb extract, additional oils), colorants/dyes, fragrance/essential oils; pour  soap into mold  and after 24-48 hours you can unmold the soap and cut into bars. These bars need to be cured for 4-6 weeks.
In the hot process method the soap is heated on the oven (about 2-3 hours) or in a crockpot (about 1-2 hours). After the soap reaches gel phase and saponification process ends, you can add all additives (super-fatting oils, fragrances/essential oils, colorants) and pour the soap into mold. After the soap cools down and hardens you can cut it into bars. They can either be used immediately or be cured for 1-2 weeks.

Pioneer soapmakers, boiling their soap in big kettles over an open fire were basically doing a hot process soap.
Is one better than the other?

Let's take a look on the cold process method:


Pros:
- You spend about 1 hour to making the batch of soap.
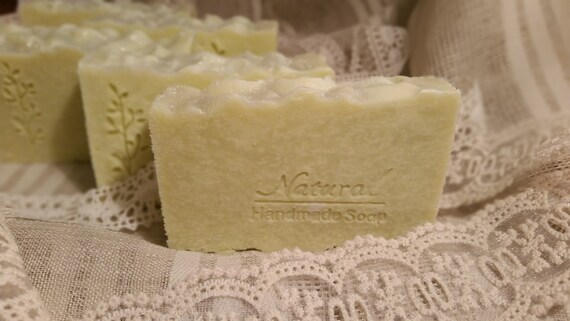
- You can use different colors/dyes and create a nice decoration of soap (such as, swirls technique).
- You can use different molds to create varied shapes. 
- You can create much smoother looking bars.

Cons:

- Curing time takes up to 6 weeks.
- Fragrance and essential oils can be changed during curing time.
- You don't know exactly which oils will stay for nourishing  aim after they react with lye.
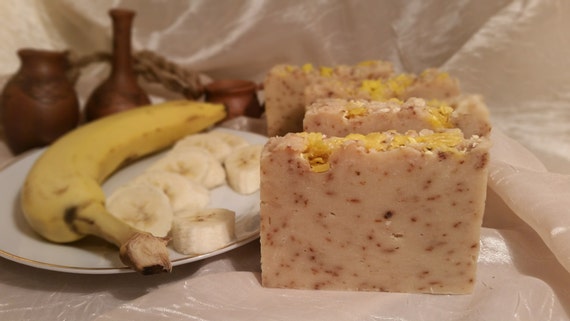
- All additives, such as honey, juices, purees of veges and fruits, herbs extracts, will react with lye and will loose their healthy potential.

Now we can discuss the hot process method:


Pros:
- Curing time is much faster. You can use the soap bars immediately after cutting, but it's better to let them about 1 week or so to evaporate the water.
- All nourishing ingredients have to be added after saponification ends and they will not react with lye, keeping their compassionate function. 
-  You will know which oils will go to super-fat - because you can add more expansive, nourishing oils after the chemical reaction (saponification).

Cons:
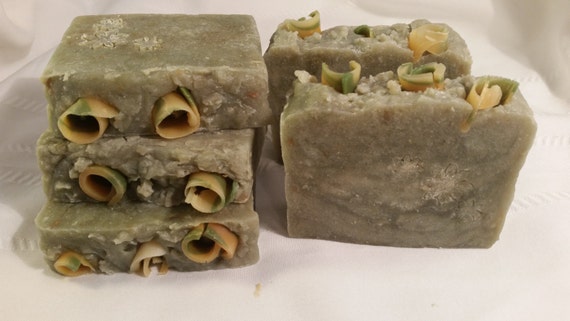
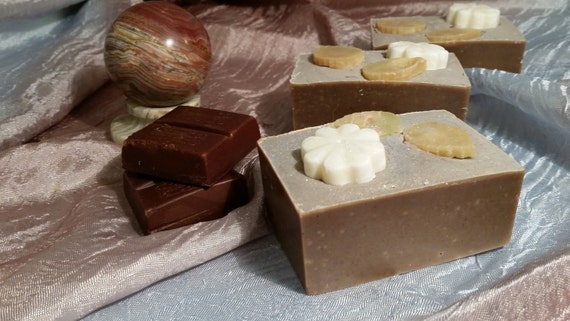
- The soap has a rougher, more rustic look.
- It's not a lot of variations for design this soap, because it is too thick, for example, for swirls.
- Difficult to use individual molds for each soap bar because thickness.
- You need to spend your time for "cooking" the soap. It takes about 2-3 hours.

So, both methods have their advantages and disadvantages.You can try each of them and decide which method is better for you. Or you can use both of them, like me, and take all their advantages from time to time. 

Saturday, February 21, 2015

Hot process soapmaking tutorial.

I know that some soapmakers recommend to beginners to start with cold process because it is easier to handle. But I remember that I started my journey of soapmaking with hot process and can say - I love results.

For Cold process of soapmaking you need to prepare all stuff (super fat, essential oils, fragrance, colors, additives) before starting, because you will not have time when soap goes to trace. In Hot process soap making you will "cook" soap for about 2-3 hours and all stuff you will add at the end of process. Actually, this is beneficial, because your nourishing oils, essential oils and many other  healthful things will be added after saponification finish and will not react with lye, keeping their compassionate function.
For starting making soap, please, see my post about cold process.
Briefly, I will describe process step by step:
1. Safety, safety, safety...
Remember about you are working with dangerous substance - NaOH - sodium hydroxide or lye. 
Please, read carefully my post about lye safety!
2. Prepare lye solution - add lye to water, not opposite way!
3. Weight butters and oils and melt  it in microwave.
4. Mix oils and water/lye solution and blend with the stick blender until it reached trace.


All these steps above are the same for both Cold and Hot processes of soapmaking.
Below are the differences which belong solely to Hot process: 

5. Put your pot in oven preheated to 170-175F.
6. Heat will speeding up the saponification process. Soap will starting to gel when you see a darker-hued and gelatinous-looking ring starting to form. You need to wait until your soap has gone through a full gel phase, meaning the entire soap has taken on the darker-hued and gelatinous look.
Time of this step is differ. For all my formulas it takes about 45 minutes to hour.
7. Keep your soap in oven about 2-3 hours. Periodically over the oven time I take off my pot and mix  the soap well. Usually I do it 3-4 times during heating.
8. During this cooking you have time to prepare all additives -
  a) weigh a super fat - this is nourishing oils, for example, avocado oil, sea buckthorn oil, argan oil,
  b) weight the fragrance or essential oils, 
  c) if you use mineral pigments for coloring, now is time to dissolve them in the small amount of oil,
  d) prepare all other stuff according your formula (honey, milk, oatmeal, clay...)
9.  At the end of "cooking" the mix will be a clear Vaseline like look. Now you can test it to see if it is done. Take a small piece of the soap and rub it between your fingers. It should have a waxy feel. Test the soap by touching it to your tongue, if it 'zaps' like a nine volt battery, it's not done. Keep cooking until it no longer 'zaps'.
10. Incorporate your prepared additives in the soap. You will have to work fast while mixing since the soap will cool quickly.
11. Soap is a thick mass now, like mashed potatoes. You need to scoop this mass into the mold quickly. Make sure to gently tap the mold on the counter to get out any air spaces/pockets.
12.  Leave the mold at room temperature. It can take 24-48 hours to cool down and harden enough to remove from the mold.
13. Remove the soap from the mold and cut it into bars. They can either be used immediately or be cured for 1-2 weeks.
14. You're done!


Sunday, February 8, 2015

Soapmaking tutorial: Cold process soap. Castile Soap.

 
Today I will show the cold process of soap making step by step. I've choose Castile soap, because this is easy soap for beginners. Castile soap is perfect to nourish the sensitive skin. Of course, it is great for babies as well!  Traditionally Castile soap made with 100% Extra Virgin Olive Oil by cold process soap making.  We will add only the coconut oil, just 10%.

What will you need for making soap.
1)      Equipment and tools.
2)      Lye.
3)      Oils and/or butters.
4)    Distilled water.
 
 Equipment and tools:
1)  One big, glass or steel bowl (I use Pyrex), for mixing oils and lye solutions. Choose not flat container, because when you will mix by stick blender you can avoid splashing.
2)   One smaller heat-resistance bowl to mix lye and water.
3)   One container for weighting lye. I used disposable plastic ones.
4)  Digital scale with accurate measurement at least to 1 g.
5)  Thermometer.
6)   Stick blender.
7)   Spoons and spatulas. I used disposable plastic spoons. 
8)  Protective wear: glasses and rubber gloves, long sleeved shirt. Keep a bottle of vinegar nearby so to be able to neutralize fast the potential but unlikely accidental lye spills.
9)   Mold for soap – wood, plastic. 
10) Strainer (only plastic).


Lye safety:
Lye can be fatal if swallowed!

1.Be sure that children and pets are not around during your soap making.
2.Always wear rubber gloves and protective glasses, and clothing, such as a long sleeved shirt when working with lye.
3.Be sure to work in a well-ventilated area. Vapors releases when you mix lye with water and can greatly irritate the lungs.
4.Always have a bottle of vinegar close at hand. Vinegar will help to neutralize the lye/water mixture.
5.Do not use any containers made of tin, zinc or aluminum. Lye will react with them. Recommended containers for mixing your soap include glass, plastic, stainless steel, and enamel.
6.Lye can damages your counter-top, so be careful and use covers - tablecloth, papers…do not let lye to come into contact with surface of your kitchen bench.
7.Freshly made soap can burn and irritate the skin, so wear gloves when you touch soap (unmold, cut).


 Now you are ready!

 1.       Weight you water and put in freezer.
 
  2.       Weight butters/solid oils (such as shea, palm, palm kernel, coconut, babassu) in big container.  In our case this is coconut oil. 
  3.       Melt butters/solid oil. I’ve put my Pyrex bowl in microwave. Or you can place your soap making pot with the solid oils onto the stove over medium heat.
 
4.Take your pot out periodically and stir content until all of the solid oils will be melted. 
5.Once the solid oils are melted, add the (room temperature) liquid oils to the soap bowl. This will bring the overall temperature down.
 
 6.    Now we will prepare our lye/water solution and we need to wear rubber gloves and glasses. Measure out the dry lye in a plastic cup. Be sure to make your lye measurement exact! 
 7.    Remove your glass bowl with water from freezer and place it in the sink. I’ve used additional container with ice, because mixture of lye/water will quickly become very hot. Pour the dry lye into water, water becomes cloudy. Continue stirring until the water turns clear.  Remember to always pour the lye into the water, not the water into the lye!
 
  8.  Now wait until oil mixture and dissolved lye have reached the same temperatures. I like to mix my solutions at around 95F, but it depends on recipes and conditions. You can warm up either solution by inserting the container into hot water or cool it down by inserting the container into cold water until the temperatures will become equal.
 9.   After this step completed slowly pour the lye/water solution into the oil mixture. Good practice to use strainer to avoid not-dissolving particle to be in soap. In our case we used water and can see clear lye/water solution, but if you use milk, coffee, dark tea, wine, or any other non-clear solutions you will definitely need to double check.
Now you can clearly see two separate layers - oils and water/lye.
10.    Blend with the stick blender until it reaches trace.
11. Tracing is easily recognized. Using a plastic spatula, drizzle a small amount on the top of the soap surface. If a trail remains visible for a few seconds before disappearing again, your soap has traced.
12. Fragrances and colors would be added now, but we’ll skip those because a) this is a beginner process, b) this is Castile soap for sensitive skin without any additives.  Pour the soap into the mold before it gets too thick.
13. Cover the mold with its lid (or you can use a cardboard or plastic wrap), then wrap it with towels and leave in a warm place for about 12 hours
 
 
14. During this time the saponification process will continue and our soap will go through gel phase. Don’t disturb the soap. I unwrapped my soap just to take picture for you. 
15. The next morning, the soap is ready to cut.
   I wrap each bar into paper and keep the soap at cool place. But we need to wait 4-6 weeks until saponification finished – soap “needs to age”.