Today I will show the cold process of soap making step by step. I've choose Castile soap, because this is easy soap for beginners. Castile soap is perfect to nourish the sensitive skin. Of course,
it is great for babies as well! Traditionally Castile soap made with 100% Extra
Virgin Olive Oil by cold process soap making. We will add only the coconut oil, just 10%.
What
will you need for making soap.
1) Equipment
and tools.
2)
Lye.
3) Oils
and/or butters.
4) Distilled water.
Equipment and tools:
1) One
big, glass or steel bowl (I use Pyrex), for mixing oils and lye solutions.
Choose not flat container, because when you will mix by stick blender you can
avoid splashing.
2) One
smaller heat-resistance bowl to mix lye and water.

3)
One
container for weighting lye. I used disposable plastic ones.
4) Digital
scale with accurate measurement at least to 1 g.
5) Thermometer.
6) Stick
blender.
7) Spoons
and spatulas. I used disposable plastic spoons.
8) Protective
wear: glasses and rubber gloves, long sleeved shirt. Keep a bottle of vinegar
nearby so to be able to neutralize fast the potential but unlikely accidental lye spills.
9) Mold
for soap – wood, plastic.
10) Strainer (only plastic).
Lye safety:
Lye can be fatal if swallowed!
1.Be sure
that children and pets are not around during your soap making.
2.Always
wear rubber gloves and protective glasses, and clothing, such as a long sleeved
shirt when working with lye.
3.Be sure to work in a
well-ventilated area. Vapors releases when you mix lye with water and can
greatly irritate the lungs.
4.Always
have a bottle of vinegar close at hand. Vinegar will help to neutralize the
lye/water mixture.
5.Do not
use any containers made of tin, zinc or aluminum. Lye will react with them.
Recommended containers for mixing your soap include glass, plastic, stainless
steel, and enamel.
6.Lye can
damages your counter-top, so be careful and use covers - tablecloth, papers…do not let lye to come into
contact with surface of your kitchen bench.
7.Freshly
made soap can burn and irritate the skin, so wear gloves when you touch soap
(unmold, cut).

Now you are ready!
1.
Weight
you water and put in freezer.

2.
Weight
butters/solid oils (such as shea, palm, palm kernel, coconut, babassu) in big
container. In our case this is coconut
oil.

3.
Melt
butters/solid oil. I’ve put my Pyrex bowl in microwave. Or you can place your soap making
pot with the solid oils onto the stove over medium heat.

4.Take your pot out periodically and stir
content until all of the solid oils will be melted.
5.Once the solid oils are melted, add the
(room temperature) liquid oils to the soap bowl. This will bring the overall
temperature down.

6. Now
we will prepare our lye/water solution and we need to wear rubber gloves and
glasses. Measure out the dry lye in a plastic cup. Be sure to make your lye
measurement exact!

7. Remove your glass bowl with water from freezer and place it
in the sink. I’ve used additional container with ice, because mixture of lye/water will
quickly become very hot. Pour the dry lye into water, water becomes cloudy. Continue
stirring until the water turns clear. Remember to always
pour the lye into the water, not the water into the lye!

8. Now wait until oil mixture and dissolved lye have reached
the same temperatures.
I like to mix my solutions at around 95F, but it depends on
recipes and conditions. You
can warm up either solution by inserting the container into hot water or cool
it down by inserting the container into cold water until the temperatures will become
equal.

9. After this step completed slowly pour the lye/water
solution into the oil mixture. Good practice to use strainer to avoid
not-dissolving particle to be in soap. In our case we used water and can see
clear lye/water solution, but if you use milk, coffee, dark tea, wine, or any other non-clear solutions you will definitely need to double check.

Now you can clearly see two separate layers - oils and water/lye.

10.
Blend
with the stick blender until it reaches trace.

11. Tracing
is easily recognized. Using a plastic spatula, drizzle a small amount on the
top of the soap surface. If a trail remains visible for a few seconds before
disappearing again, your soap has traced.

12.
Fragrances
and colors would be added now, but we’ll skip those because a) this is a
beginner process, b) this is Castile soap for sensitive skin without any
additives. Pour
the soap into the mold before it gets too thick.

13. Cover the mold with its lid (or you can use a
cardboard or plastic wrap), then wrap it with towels and leave
in a warm place for about 12 hours.


14. During
this time the saponification process will continue and our soap will go through
gel phase.
Don’t disturb
the soap. I unwrapped my soap just to take picture for you.

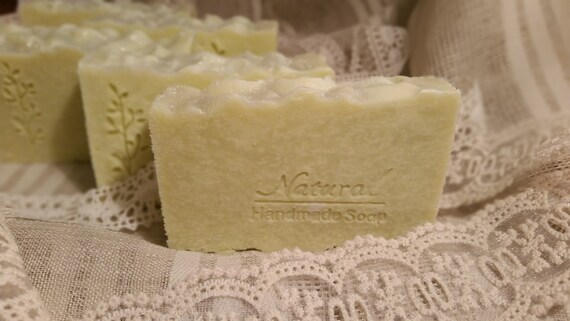
15. The
next morning, the soap is ready to cut.


I
wrap each bar into paper and keep the soap at cool place. But we need to wait
4-6 weeks until saponification finished – soap “needs to age”.
No comments:
Post a Comment