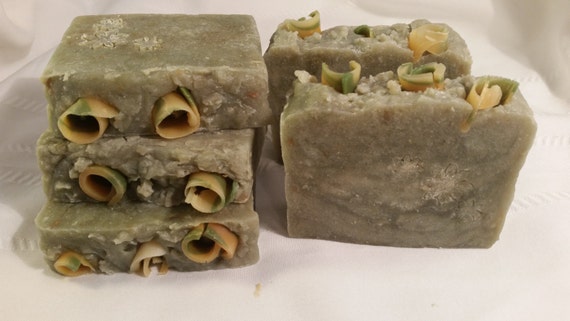
I know that some soapmakers recommend to beginners to start with cold process because it is easier to handle. But I remember that I started my journey of soapmaking with hot process and can say - I love results.
For Cold process of soapmaking you need to prepare all stuff (super fat, essential oils, fragrance, colors, additives) before starting, because you will not have time when soap goes to trace. In Hot process soap making you will "cook" soap for about 2-3 hours and all stuff you will add at the end of process. Actually, this is beneficial, because your nourishing oils, essential oils and many other healthful things will be added after saponification finish and will not react with lye, keeping their compassionate function.
For starting making soap, please, see my post about cold process.
Briefly, I will describe process step by step:
1. Safety, safety, safety...
Remember about you are working with dangerous substance - NaOH - sodium hydroxide or lye.
Please, read carefully my post about lye safety!
2. Prepare lye solution - add lye to water, not opposite way!
3. Weight butters and oils and melt it in microwave.
4. Mix oils and water/lye solution and blend with the stick blender until it reached trace.
All these steps above are the same for both Cold and Hot processes of soapmaking.
Below are the differences which belong solely to Hot process:
5. Put your pot in oven preheated to 170-175F.
6. Heat will speeding up the saponification process. Soap will starting to gel when you see a darker-hued and gelatinous-looking ring starting to form. You need to wait until your soap has gone through a full gel phase, meaning the entire soap has taken on the darker-hued and gelatinous look.
Time of this step is differ. For all my formulas it takes about 45 minutes to hour.
7. Keep your soap in oven about 2-3 hours. Periodically over the oven time I take off my pot and mix the soap well. Usually I do it 3-4 times during heating.
8. During this cooking you have time to prepare all additives -
a) weigh a super fat - this is nourishing oils, for example, avocado oil, sea buckthorn oil, argan oil,
b) weight the fragrance or essential oils,
c) if you use mineral pigments for coloring, now is time to dissolve them in the small amount of oil,
d) prepare all other stuff according your formula (honey, milk, oatmeal, clay...)
9. At the end of "cooking" the mix will be a clear Vaseline like look. Now you can test it to see if it is done. Take a small piece of the soap and rub it between your fingers. It should have a
waxy feel. Test the soap by touching it to your tongue, if it 'zaps'
like a nine volt battery, it's not done. Keep cooking until it no longer
'zaps'.
10. Incorporate your prepared additives in the soap. You will have to work fast while mixing since the soap will cool quickly.
11. Soap is a thick mass now, like mashed potatoes. You need to scoop this mass into the mold quickly. Make sure to gently tap the mold on the counter to get out any air spaces/pockets.
12. Leave the mold at room temperature. It can take 24-48 hours to cool down and harden enough to remove from the mold.
13. Remove the soap from the mold and cut it into bars. They can either be used immediately or be cured for 1-2 weeks.
14. You're done!

No comments:
Post a Comment